How to Sign Up for Binance in 2026 (Step-by-Step)
Complete guide to creating a Binance account with a referral discount. KYC verification, 2FA setup, and first deposit explained.

Why Sign Up Through a Referral Link?
When you register through a referral link, you automatically receive up to 20% off all trading fees for the lifetime of your account. This discount applies to both spot and futures trading. There is no downside — you get the exact same account with lower fees.
The referral discount is permanent and cannot be added after registration. If you create an account without a referral code, there is no way to apply one later. This is why it's critical to use a referral link from the very start. Our referral code RATE20 provides the maximum 20% discount available.
To put this in perspective: if you trade $10,000 per month on spot, the referral discount saves you about $20/month or $240/year. For futures traders with higher volume, savings can reach thousands of dollars annually. The discount stacks with other fee reductions like BNB payment (additional 25% off) and VIP tiers.
Step 1: Click the Referral Link
Visit the Binance registration page through our referral link. The referral code RATE20 will be pre-filled in the referral/invite code field. Before proceeding, visually confirm that the referral code field is populated — this is your only chance to lock in the fee discount.
If you're on mobile, the Binance app will open automatically if installed. If not, the registration page opens in your mobile browser. Both paths support the referral code. You can also download the Binance app from the App Store or Google Play and manually enter the referral code RATE20 during registration.
Step 2: Enter Your Email and Password
Enter a valid email address and create a strong password. Binance requires passwords to be at least 8 characters with a mix of uppercase letters, lowercase letters, and numbers. Avoid using passwords you've used elsewhere — crypto accounts are high-value targets.
Alternatively, you can register with your phone number instead of email. Some users prefer phone registration for faster SMS verification. Either method works equally well, and you can add the other as a secondary verification method later.
You'll also need to agree to Binance's Terms of Service. Binance is available in most countries, but users in the United States must use Binance.US (a separate platform). Check your local regulations if you're unsure about availability in your region.
Step 3: Verify Your Email or Phone
Binance sends a 6-digit verification code to your email or phone. Enter the code within the time limit (usually 30 minutes for email, 10 minutes for SMS). If you don't receive the code, check your spam/junk folder for email, or ensure your phone has signal for SMS.
Common issues: Some email providers (especially corporate emails) may block Binance messages. If this happens, try a personal Gmail, Outlook, or Yahoo account. For phone verification, make sure your number supports receiving international SMS.
Step 4: Complete KYC (Identity Verification)
KYC (Know Your Customer) verification is mandatory on Binance for deposits, withdrawals, and trading. There are typically two levels: Basic verification requires your name, date of birth, and address. Advanced verification requires a government-issued photo ID and a selfie or facial recognition scan.
Accepted documents include passports, national ID cards, and driver's licenses. The document must be valid (not expired) and the photos must be clear and readable. During the selfie step, ensure good lighting, remove glasses, and look directly at the camera.
Verification is usually processed within minutes using automated systems, but during peak periods it can take up to 24-48 hours. If your verification is rejected, the most common reasons are: blurry photos, expired documents, or mismatched information between your ID and the details you entered. You can resubmit with corrected information.
Ready to get started?
Step 5: Enable Two-Factor Authentication (2FA)
Two-factor authentication adds a critical layer of security. Binance supports several 2FA methods: Google Authenticator (TOTP), SMS authentication, email verification, and Binance Authenticator (their own app).
Google Authenticator is the recommended option. It generates time-based codes offline, making it immune to SIM-swap attacks that can compromise SMS 2FA. To set it up: download Google Authenticator, scan the QR code shown on Binance, and enter the 6-digit code to confirm. Important: save the backup/recovery key somewhere safe offline — if you lose your phone without this key, recovering your account is extremely difficult.
SMS 2FA is convenient but less secure. Hackers can port your phone number through social engineering attacks on mobile carriers. If you must use SMS, treat it as a temporary measure and switch to an authenticator app as soon as possible.
For maximum security, enable multiple 2FA methods. Binance allows you to require both authenticator and email verification for withdrawals, making unauthorized access nearly impossible.
Step 6: Make Your First Deposit
Binance supports multiple deposit methods depending on your region:
Crypto transfer: Send cryptocurrency from another wallet or exchange. This is fee-free on Binance's side (you only pay the sending network's fee). Copy your Binance deposit address carefully and always send a small test transaction first.
P2P trading: Buy USDT, BTC, or other crypto directly from other users using bank transfer, mobile payment, or other local methods. Binance acts as an escrow to protect both parties. P2P has zero trading fees on Binance.
Credit/debit card: Buy crypto instantly with Visa or Mastercard. This is the fastest method but carries a fee of approximately 1-2% depending on your card issuer and region.
Bank transfer (SEPA/SWIFT): Available in supported regions. SEPA transfers in Europe are often free or very low cost. SWIFT transfers may take 1-3 business days.
Third-party payment: Binance integrates with payment providers like Simplex, Banxa, and Mercuryo for additional fiat on-ramp options.
Binance Lite vs Pro Mode
After logging in, Binance offers two interface modes. Binance Lite is a simplified view designed for beginners — it shows basic buy/sell functions, portfolio overview, and a clean dashboard without overwhelming charts or order types. This is perfect if you just want to buy and hold crypto.
Binance Pro (the default for web) unlocks the full trading interface with advanced charting (TradingView), multiple order types (limit, stop-limit, OCO, trailing stop), depth charts, and real-time order books. You can switch between Lite and Pro at any time in the app settings.
Recommendation: Start with Lite mode to familiarize yourself with the platform, then switch to Pro when you're comfortable with basic trading concepts.
Essential Security Settings After Signup
Beyond 2FA, configure these security settings immediately:
Withdrawal address whitelist: Enable this to restrict withdrawals only to pre-approved addresses. Even if someone gains access to your account, they cannot withdraw to a new address without a 24-hour waiting period.
Anti-phishing code: Set a custom phrase that appears in all legitimate Binance emails. This helps you identify phishing emails that try to impersonate Binance.
Device management: Review the list of authorized devices regularly. Remove any devices you don't recognize. Binance notifies you when a new device logs in.
Login notifications: Enable email/SMS alerts for every login attempt. This gives you immediate awareness of unauthorized access attempts.
API restrictions: If you don't use trading bots, make sure no API keys are active. If you do, restrict API keys to specific IP addresses and disable withdrawal permissions.
Common Signup Problems and Solutions
Referral code not applied: The referral code must be entered during registration. If the field was empty, the discount was not applied. Unfortunately, there's no way to add it after account creation. The only solution is to register a new account with a different email.
KYC keeps failing: Ensure your document photos are well-lit, not cropped, and show all four corners. Use the original document (not a photocopy). If facial verification fails, try in a well-lit room without glasses or hats.
Email not received: Check spam/junk folders. Add [email protected] to your contacts. If using a corporate email, try a personal one instead. You can also resend the verification email from the registration page.
Account restricted by country: Some countries have limited access to Binance. Users in the US should use Binance.US. Users in other restricted regions may need to use alternative exchanges.
2FA locked out: If you lose access to your 2FA device, use the backup key you saved during setup. If you don't have the backup key, you'll need to go through Binance's account recovery process, which requires additional identity verification and may take several days.
Verify Before You Sign Up — Don't Get Scammed
Many sites advertise fake referral discounts that don't actually apply. Before signing up through any referral link, always verify the referral code and discount rate shown on the Binance registration page. Here's proof of our verified referral:
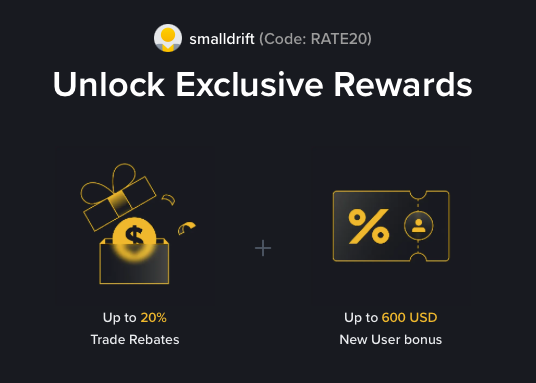
- Referral Code: RATE20
- Trade Rebate: Up to 20% on every trade (lifetime)
- New User Bonus: Up to 600 USD
If the registration page does not show these benefits, do not proceed. Only sign up when you can confirm the referral code and discount are applied.